Kitchen and Bath
Bathroom
There are a couple of known problems here- inadequate blocking to support the shower pan, a possible gap between the blackwater tank and its platform, and no seal around the toilet flange which can let shower water leak around the toilet.
Okay. Here you’ve got a closet designed to get hosed down with water. What could possibly go wrong? The regular RV checks apply here- make sure you have a watertight seal around the shower base pan and wall seams and check for any leaks below the shower drain (accessible via the compartment under the fridge). You’ll want to pick up a “tension rod” and shower curtain for over the door as it’s not designed to be water tight.
Shower Pan Support: Next, check for adequate blocking under the shower pan (again through the under-fridge compartment). Regular flexing will cause the pan to crack and/or pull away from the wall. 2x6 blocks work well here as the gap is exactly 5.5”. On a 16’, you can get access via the cupboard door under the fridge. Test fit your blocks, then apply silicone to the contact edges and re-insert. Also double check all screws securing the pan perimeter to the walls- I found many were half a turn loose, one hole was even missing a screw. Carefully tighten and apply silicone around the edge.
 |
This is all the support the factory put under our shower, as seen via the cabinet door under the fridge on our 16'. The gap is exactly 5.5" so sections of 2x6 slid into this area work perfectly to shore up the flex under and around the drain. Apply silicone when inserting and they should stay in place. Step into the shower and you'll notice the difference.
|
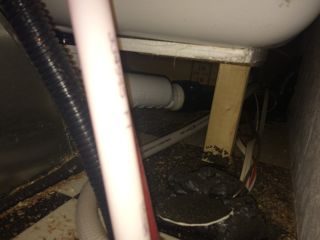
Blackwater Tank Support: There is a platform designed to support the weight of the blackwater tank that’s under the toilet (and should bear the weight of the toilet and user). The toilet itself is bolted to the shower pan. If the tank isn’t supported, the entire shower pan will flex. On a 16’, via the rear gaucho, you can determine if you have a gap. On ours, you could literally slide the platform around under the tank. I used a can of expanding foam and a drinking straw as a nozzle extension (don’t use low expansion door/window type as it will remain too flexible) to fill the void between the two. Take your time and use the foam sparingly. This is how fiberglass tubs are set these days and is a proven method, but use good judgment.
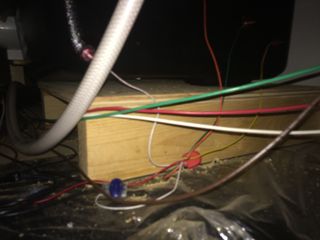 |
Notice the huge gap between the blackwater tank and platform. Very carefully, using a straw extension, this void was filled with spray foam in stages. Filling the tank with water first will help prevent bowing while the foam expands/cures.
|
Flange Leak: Once you’ve determined the blackwater tank is adequately supported, remove the toilet (nuts on each side at the base and a water hose connection at rear). Stuff a rag in the opening after removal. Using a good quality silicone, seal under/around the toilet flange to keep shower water from running underneath it and ultimately soaking the floor under the bathroom. Let it fully set-up before reinstalling the toilet.
Bath Window Leak: If you don’t see any sealant around the window trim ring, pull it and apply a generous bead of silicone to the wall. Reinstall the trim and screws and add a second bead along the top and sides of the trim or you’ll have water in your wall.
Weep Holes: You’ll also note that water from the shower can accumulate in the aluminum window “sill” behind the lower screen. Using a small drill bit, carefully drill weep holes to allow this water to run back into the bath stall.
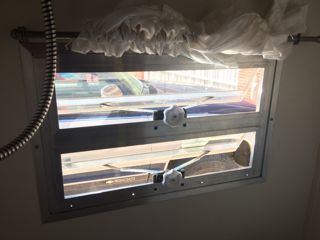 |
A single screw on each side of the window frame holds it in place. This frame was removed to run a bead of silicone around the backside and then reinstalled. A bead was also run along the top after installation for good measure. The four weep holes are visible along the bottom and allows water that collects in this channel to drain back into the shower.
|
Kitchen
Backsplash: Pick up some "peel and stick" tile to protect your wall, especially behind the cooktop where oil splatter can ruin your paneling in short order. You want something light and flexible; lots of options out there.
Cutting board: Kitchen space is always at a premium. To help alleviate that, I found a bamboo cutting board (17.75x22) on OpenSky (Amazon or Ebay work, too) and cut a slot above the cabinet over the A/C. This mod required making “extruded L’s” out of 1x2’s (or similar) for the board to ride on and a stop at the rear. A 1/2"x1/2" piece of wood screwed to the top of the cutting board sets how far out it can be pulled and maintains the board's levelness when pulled out. (board installs from behind before both rails get screwed to bottom of countertop) Since the cabinet framing isn’t solid wood, this took some careful cutting and I eventually trimmed it out with 1/8" quarter-round. It's a bit of work, but worth it for the extra work space.
Over-Sink Shelf: This is a popular one, especially on a 19’ where there’s more headroom over the kitchen window. On a 16’ it can be done if you move the curtain rod down to just under the top of the window frame (screw the rod brackets to the aluminum). Some 1/4 round glued/siliconed to the left/right cab walls makes for a lightweight support and a 12V light can be added, picking power off at the range hood.
|
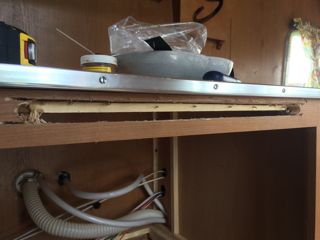
Centered opening cut after marking with the cabinet door closed. Fine tooth handsaw used to clean up ends, then trimmed in 1/8" quarter-round. Note interior framing visible that also has to be removed.
|
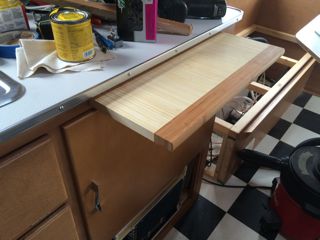
Board installed
|

Over-sink shelf made of 1/4" lauan plywood supported by 1/4" quarter-round and top of aluminum window frame. 3/8"x1-1/2" board trims out the front and is fastened on ends through cabinet walls.
|
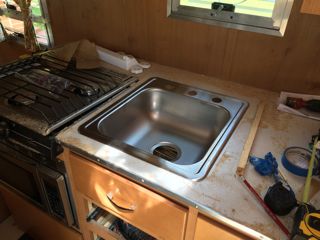
Sink Upgrade: The factory sink is far too small to be useful and the faucet is too close to the rear of the sink. Following the lead of others, we installed an Elkay D117193 ‘Dayton’ sink and a conventional "3-hole" kitchen faucet. This sink is as wide as will fit in the cabinet and with some clever plumbing of the drain line, will not interfere with storage below. I also took the opportunity to install shutoffs on both hot and cold lines which are accessible by pulling out a lower drawer. The shutoffs are PEX crimp style on one side, and have the mating thread for the faucet connections on the other. The drain consists of a 90 degree "waste tube" used with garbage disposers, cut to length and used with a compression fitting threaded onto the existing black pipe. It connects to another 90 with a flat flange. As it slopes up, it forms a natural trap yet is still shallow enough with the deeper sink to clear the drawer below.
|
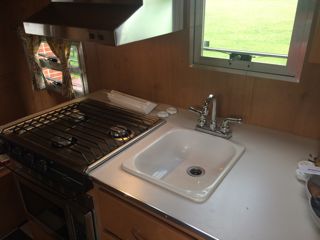
Too shallow..and look how far back that faucet is.
|

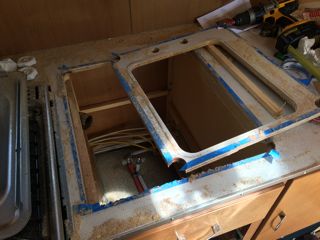
New opening traced in pencil and corners drilled with a small hole saw.
Measure twice, cut once.
|
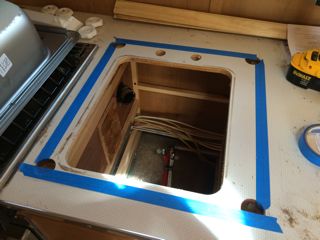
Next, tape goes on to prevent chipping.
Lines drawn on tape and verified to be within bounds of cabinet below.
|
A handheld circular saw makes quick work of it.
|
Test-fit looks good. Clips secure it from the bottom.
|
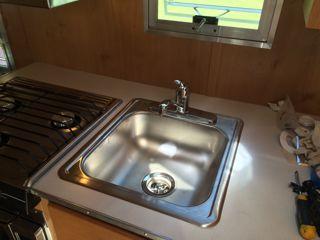
Faucet and drain basket go in, plumbing next.
|
|
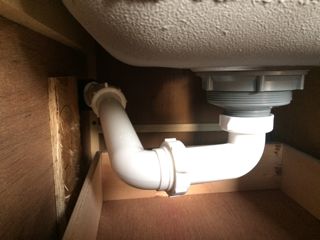
Hardware store parts make up a low-profile drain.
Rise-to-rear creates a natural P-trap.
|
|
Return to Home
Cory Heisterkamp 2017